Back
Product News
Jul 22, 2024
How to Integrate AWS SES with Engagespot for Seamless Email Delivery

Anand Sukumaran
Introduction:
In today's digital landscape, efficient email communication is paramount for engaging audiences effectively. Integrating Amazon Web Services (AWS) Simple Email Service (SES) with Engagespot offers a robust solution to enhance email delivery capabilities seamlessly.
By leveraging AWS SES via Engagespot, businesses can streamline email workflows, ensure high deliverability rates, and gain actionable insights into email performance. This integration empowers users to send personalized emails efficiently, utilizing AWS's infrastructure and Engagespot's intuitive platform.
In this blog post, we'll guide you through setting up AWS SES with Engagespot step-by-step—from creating IAM users and generating access keys to configuring SES in Engagespot and optimizing your email strategy. Explore how you can elevate your email communication with AWS SES and Engagespot.
What is AWS SES?
Amazon Web Services (AWS) Simple Email Service (SES) is a scalable and cost-effective email service that enables businesses to send and receive emails effortlessly. Designed to support both transactional and marketing email communications, AWS SES provides a reliable infrastructure for managing email delivery without the complexities of maintaining an email server.
How to create AWS SES
Step1:
Firstly, You must create an IAM user with SendEmail permission.
Go to the AWS Management Console by visiting https://aws.amazon.com/ and clicking on "Sign In to the Console" in the top-right corner
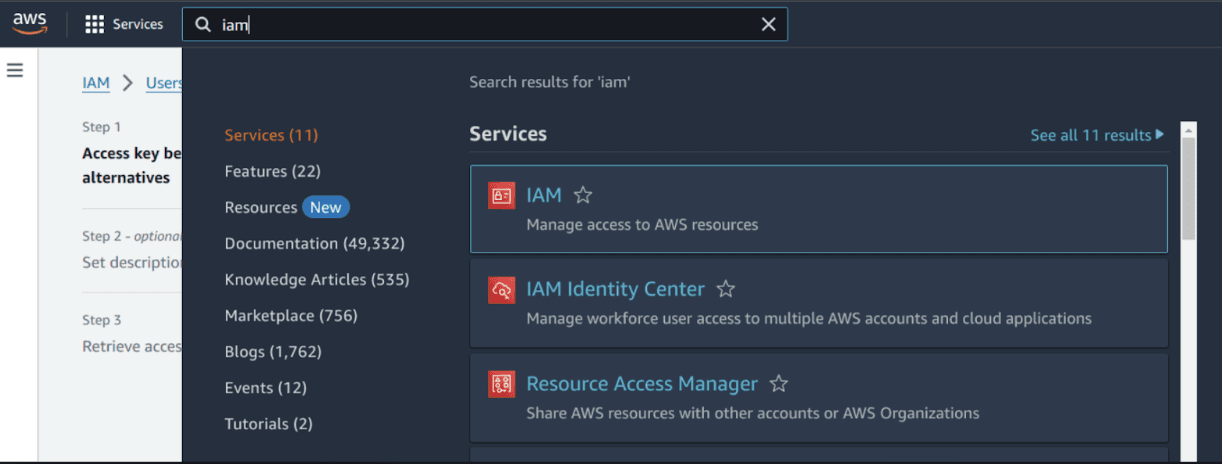
In the search box located at the top of the dashboard, type "IAM"
The search results should display the IAM (Identity and Access Management) service. Click on it to access the IAM dashboard.
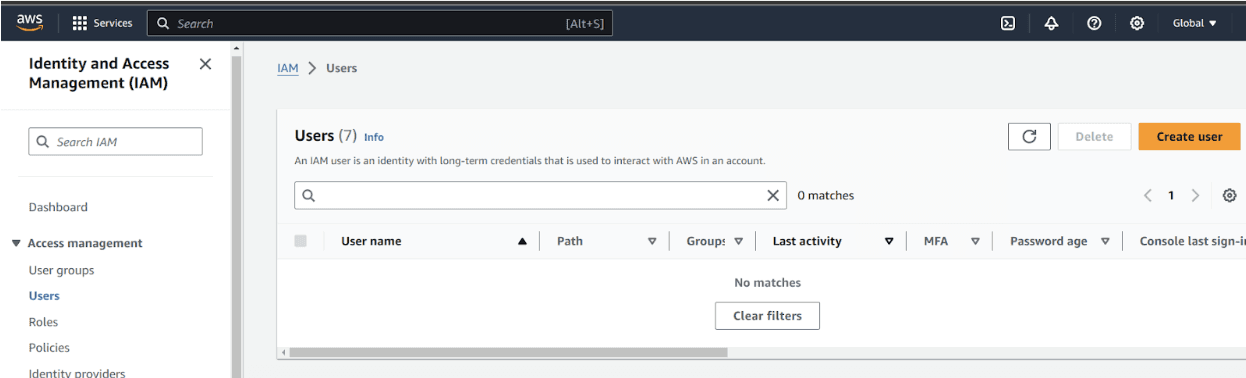
Step 2 :Then, on the sidebar, navigate to Access Management -> Users, and click Create User
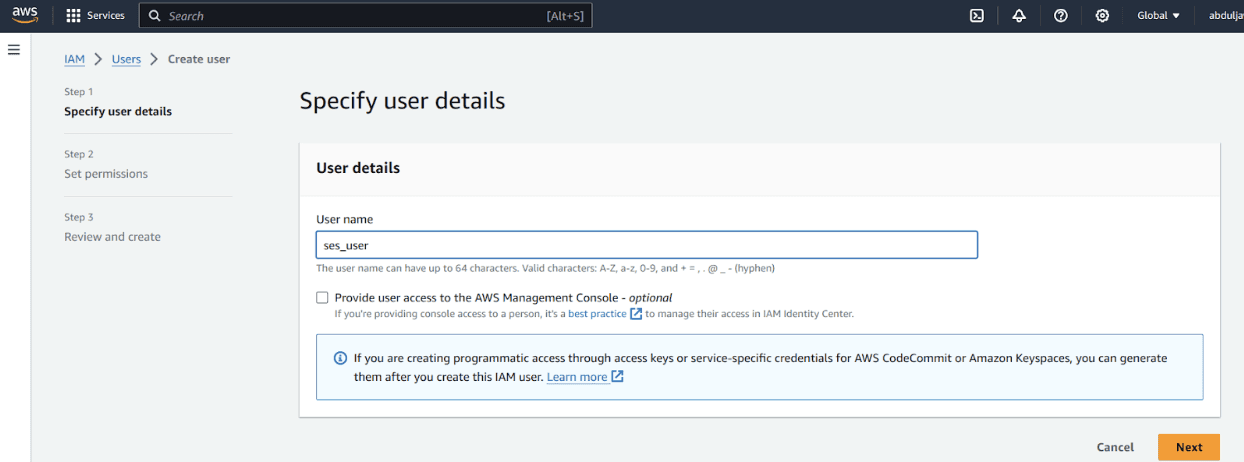
Step 3 : Give user name and click Next
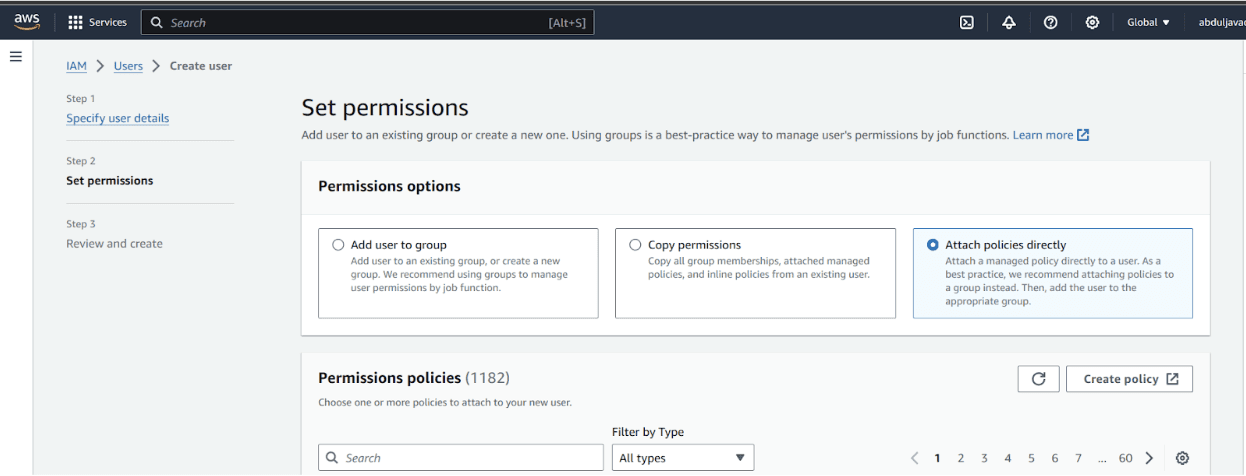
Step 4 : On the permissions screen select attach policies directly and click Create policy
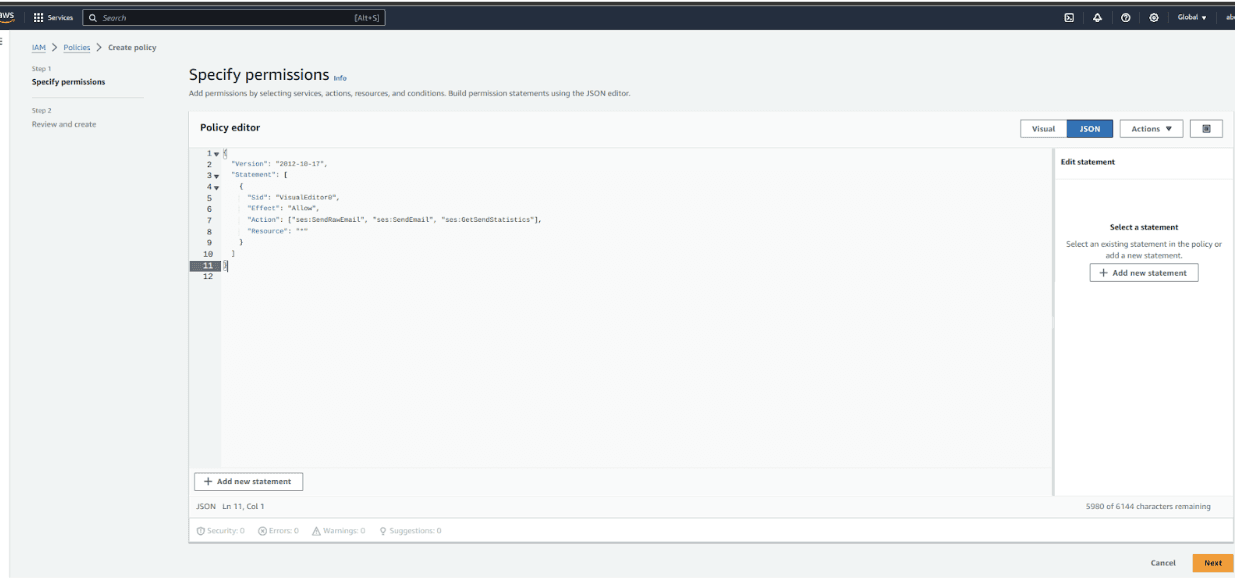
Step 5: Create Custom Policy
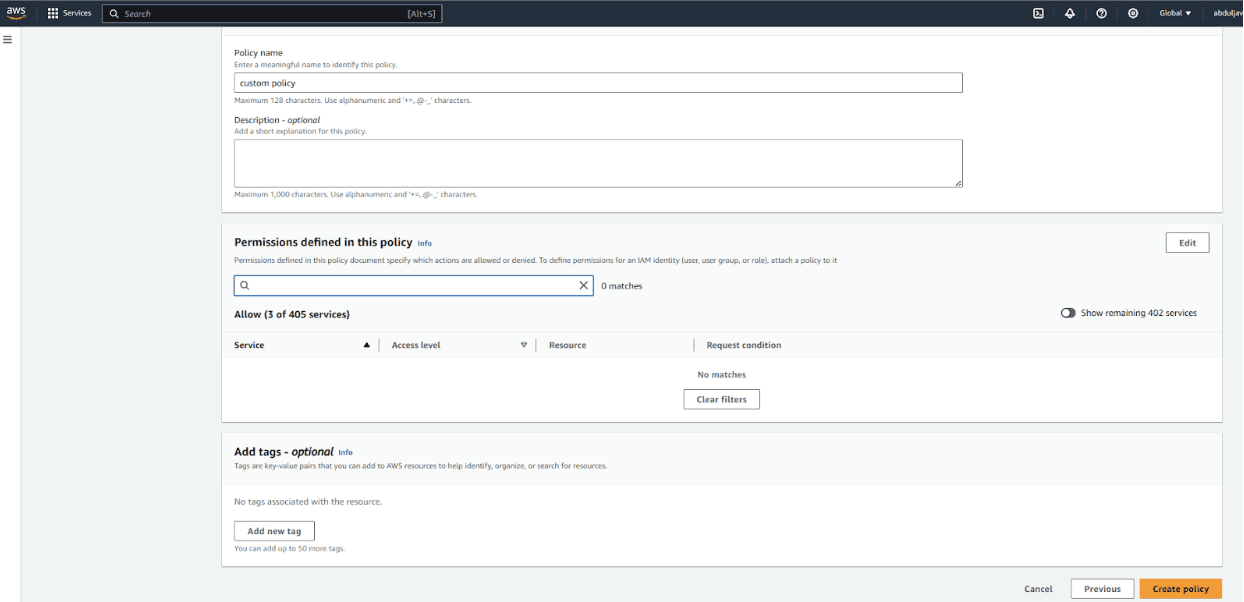
In the create policy dialog, select "JSON" tab, and paste the following policy. After that, click on the Next:Tags button at the bottom, then Next:Review button, and specify a name for your policy and finally click Create policy button.
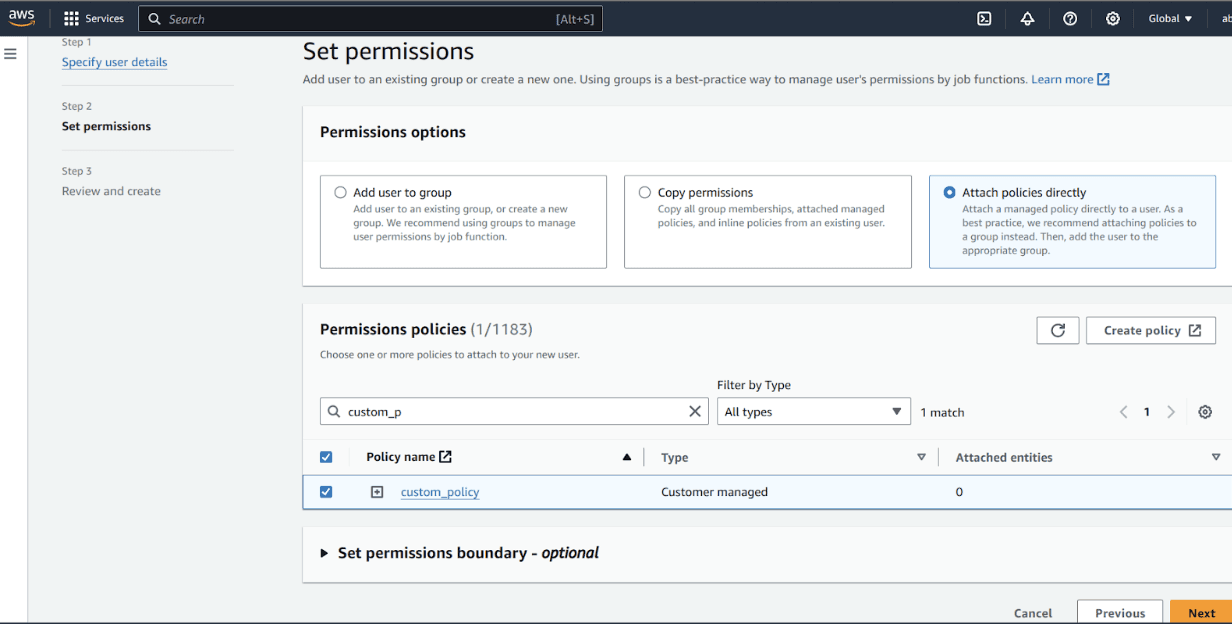
Step 6 : Select the created Policy from user permissions page and click Next and create user
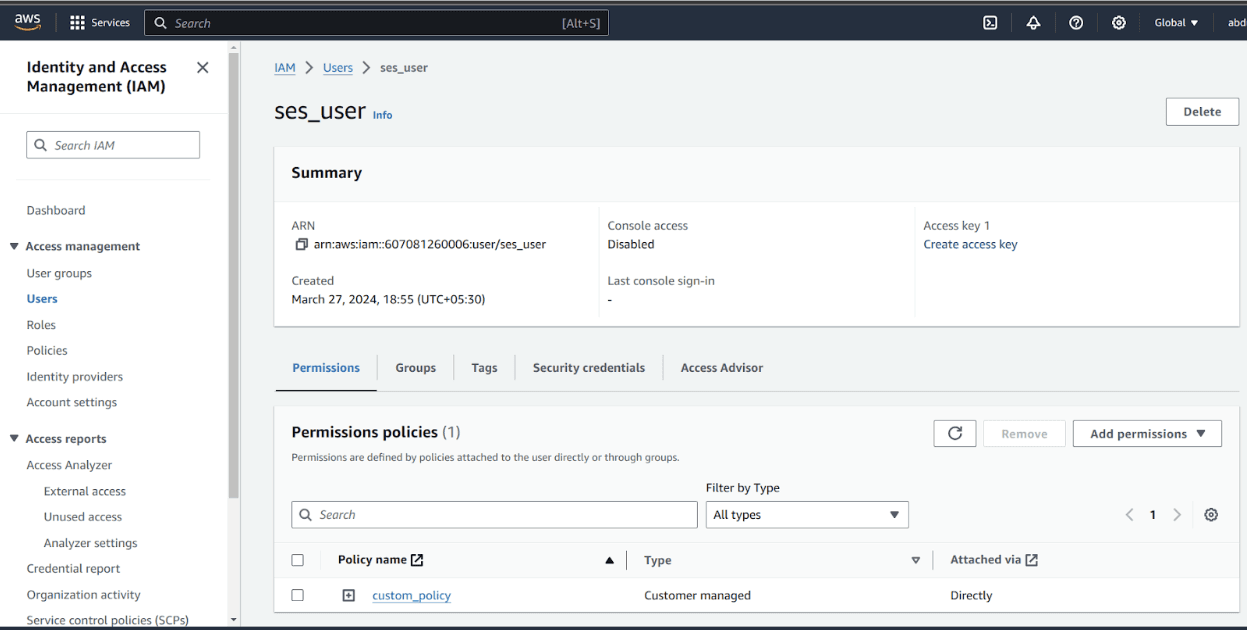
Step 7 :Click on the created user to create access keys
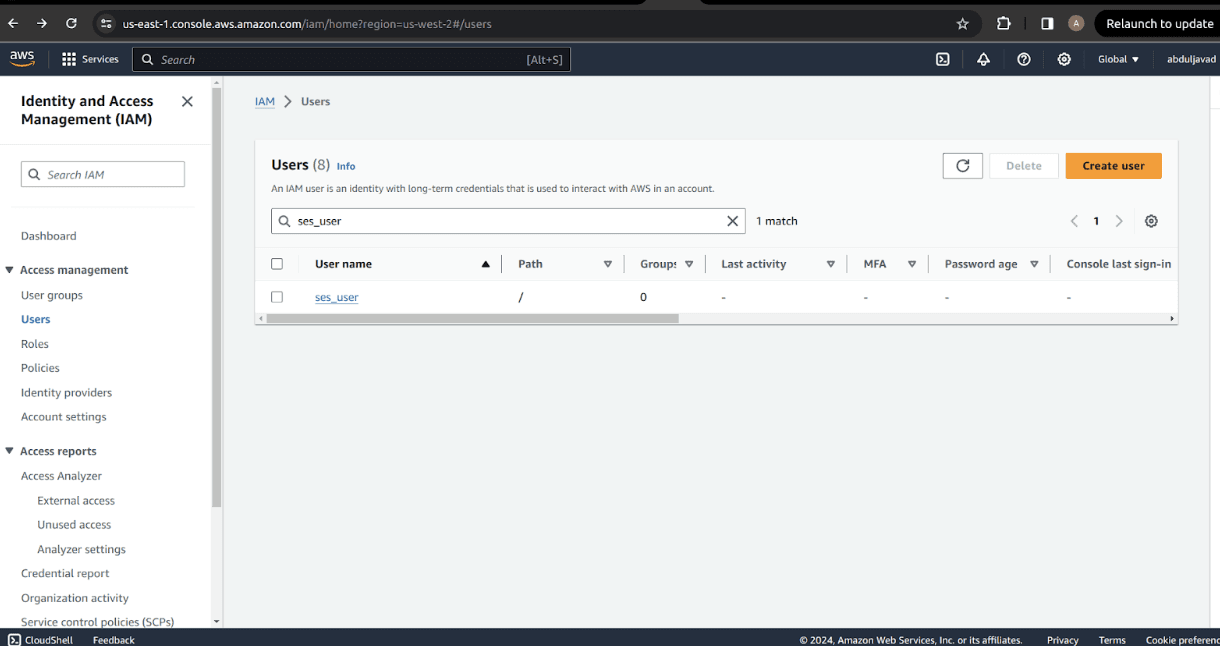
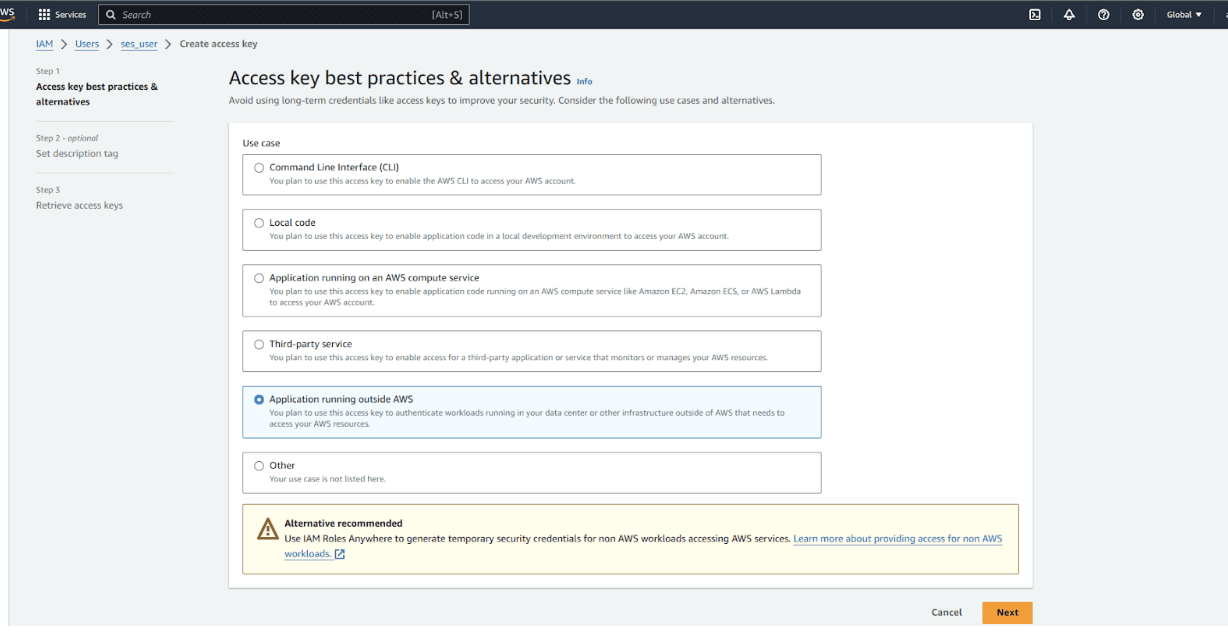
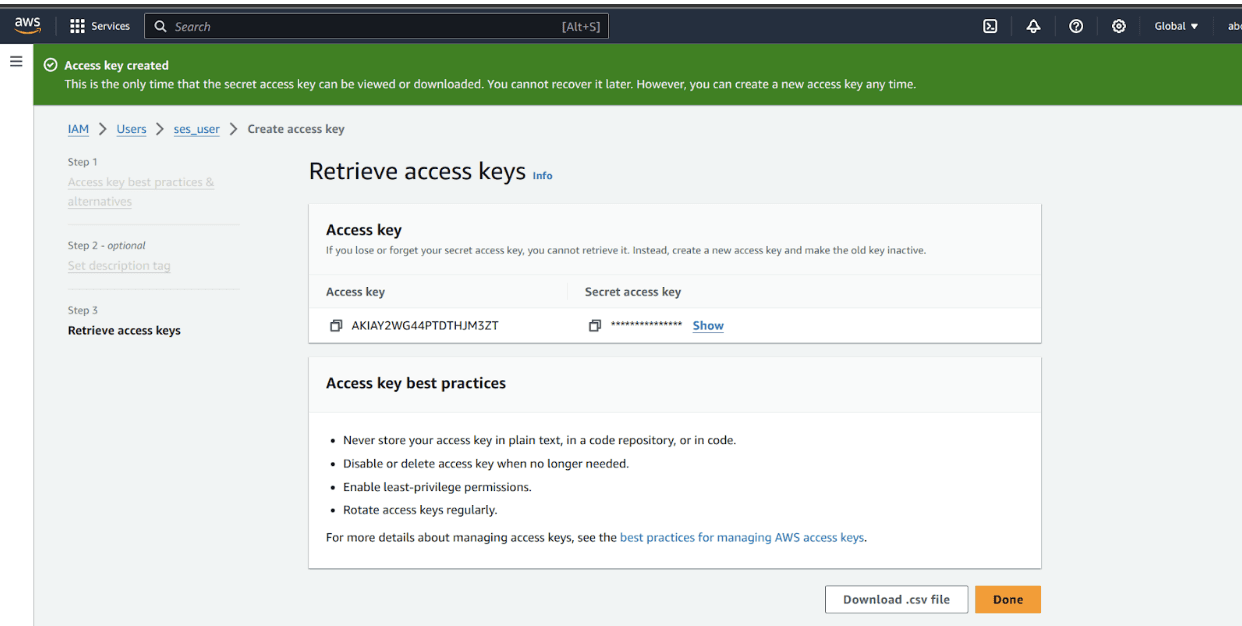
Step 8 : Click Create access key
Select Application running outside AWS and click Next
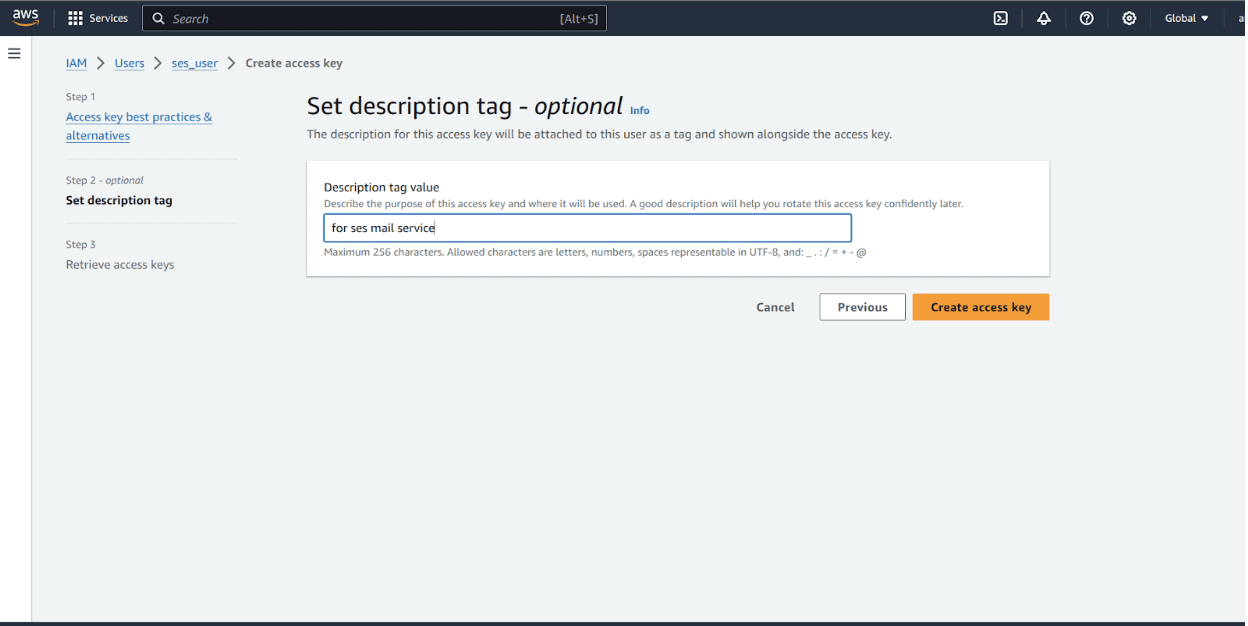
Give a short description and click Create access key
You will get the Access key and Secret access Key copy these keys or download the csv file and store it in a secured storage and click Done
SES Service: Need to verify an email to send mails using ses service so follow these steps to verify an email identity
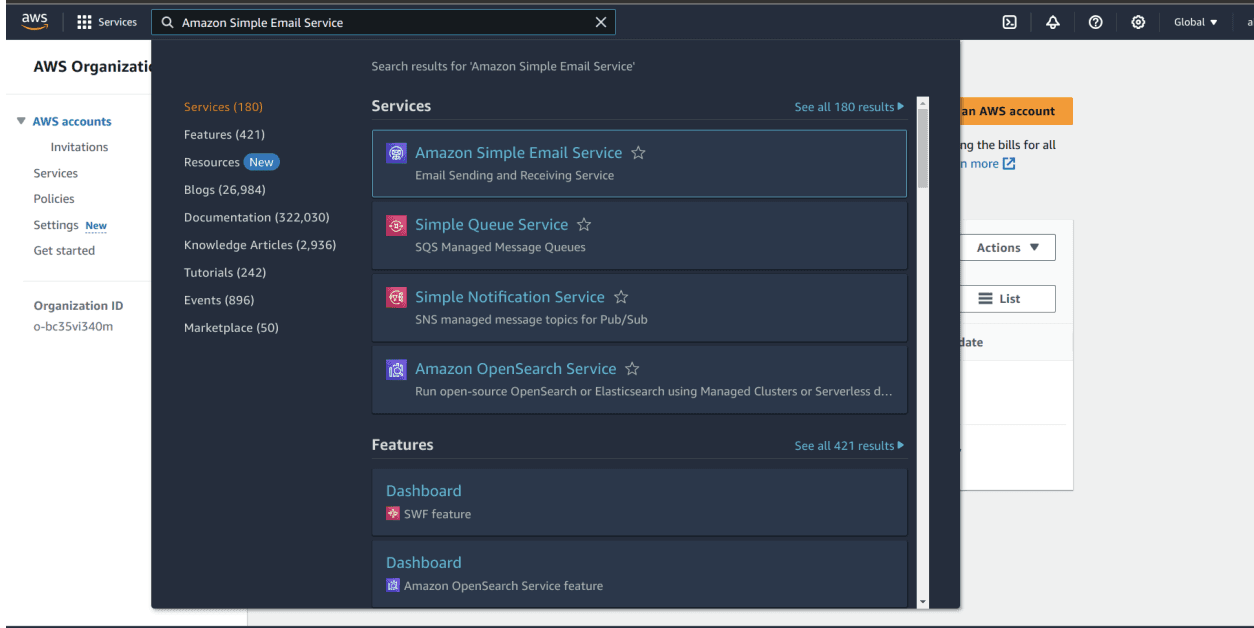
Step 9 : Search Amazon Simple Email Service in console and select the Amazon Simple Email Service
Step 10 Navigate to Identities in sidebar and click Create Identity
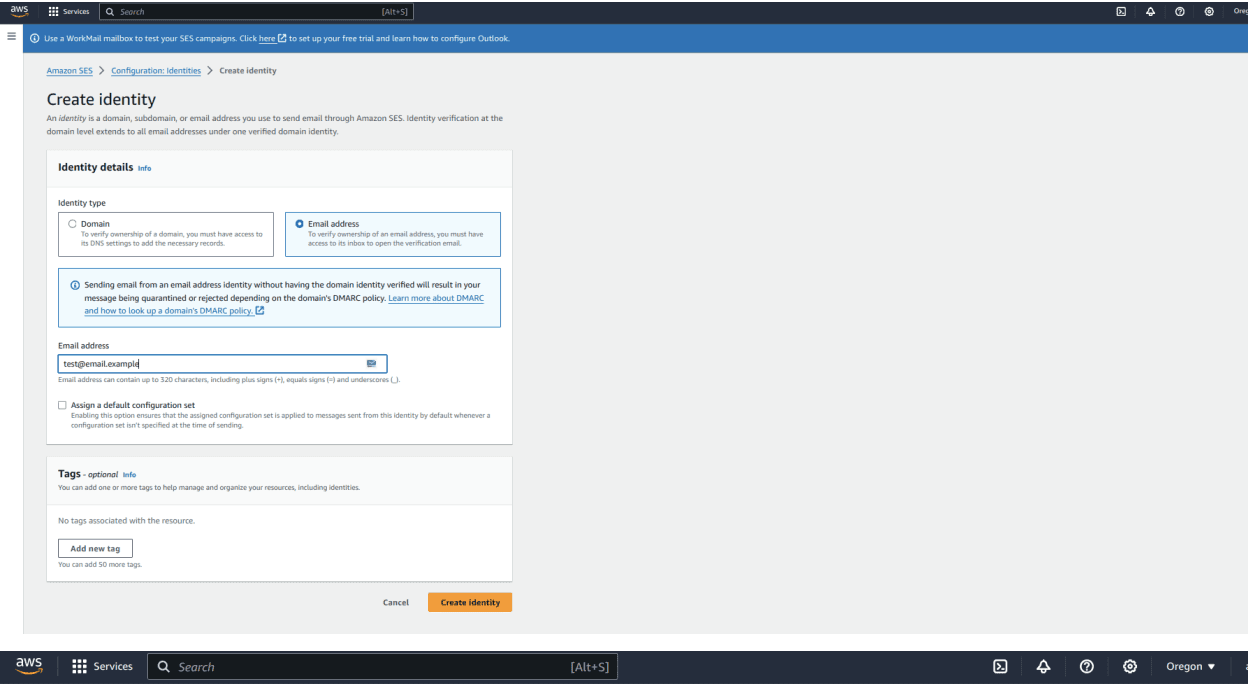
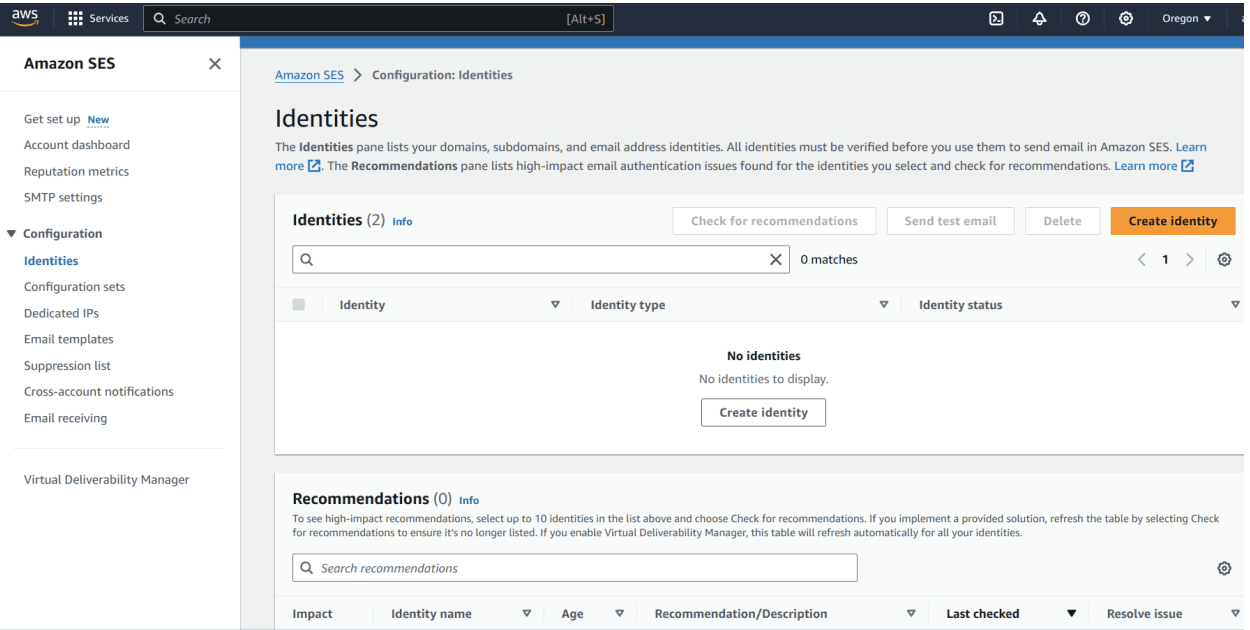
Select Email address and give an email address you want to verify and send emails from and click create identity ,A verification email will be send to the given address
Region You can find the region from top right corner eg : us-west-2
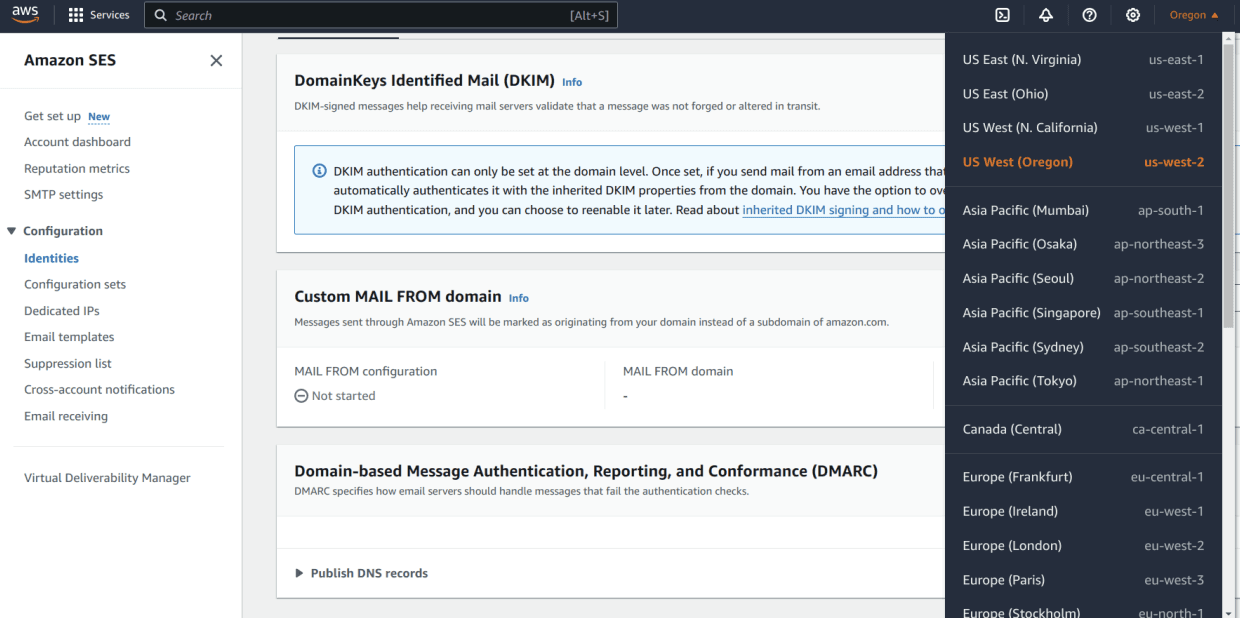
Note : Also, by default your AWS SES account will be in sandbox mode which means you can send emails only to verified identities.To enable production access, you must send a request to AWS. Read more details here
That's all done! Now, we can copy the keys and enable the SES provider in Engagespot.
Enable SES provider in Enganespot
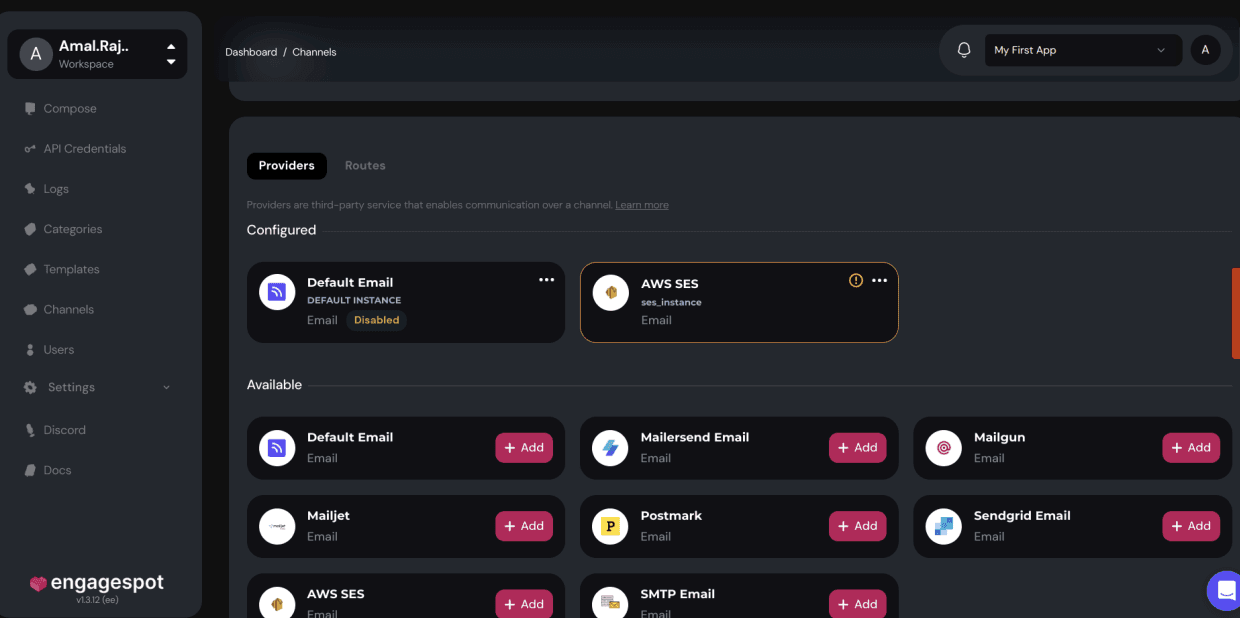
Login to your Engagespot account, select 'Channels' in the sidebar, and choose the 'Email' channel.
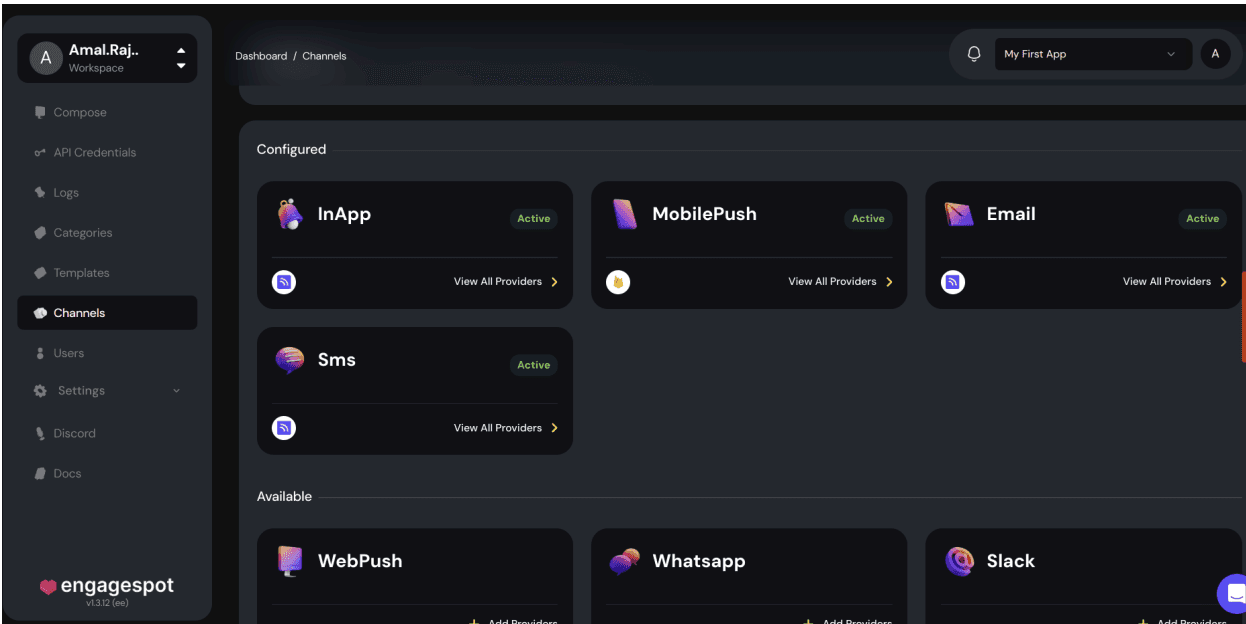
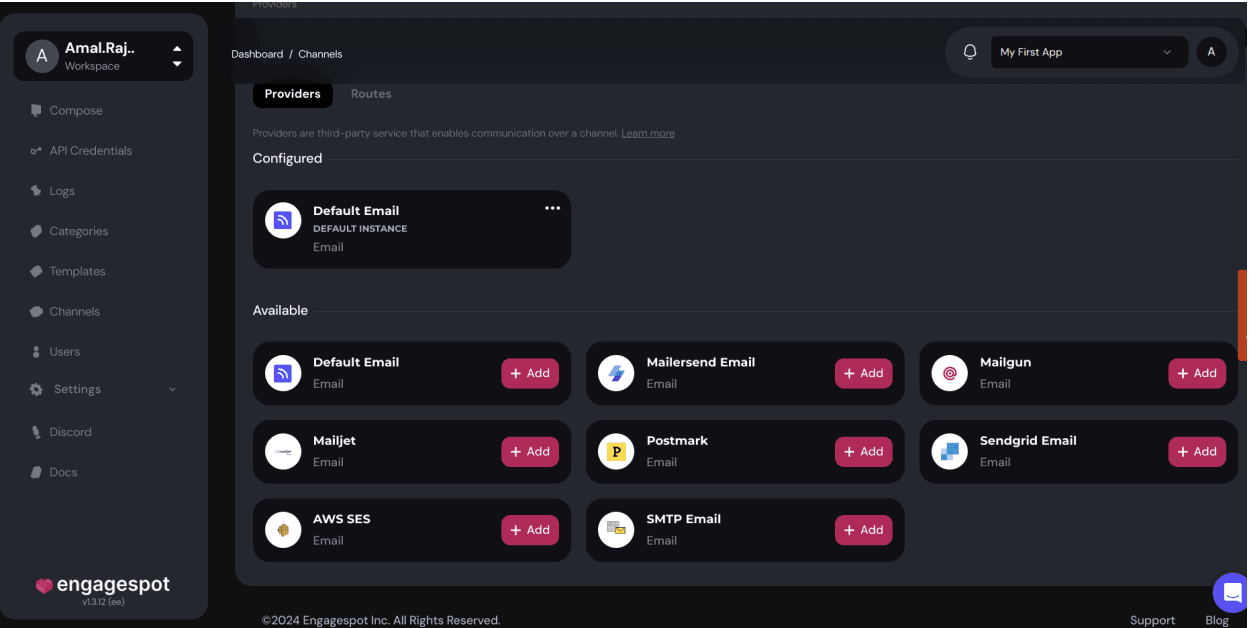
On 'View all providers,' you can find AWS SES. Click the '+Add' button to input your keys and enable the SES provider.
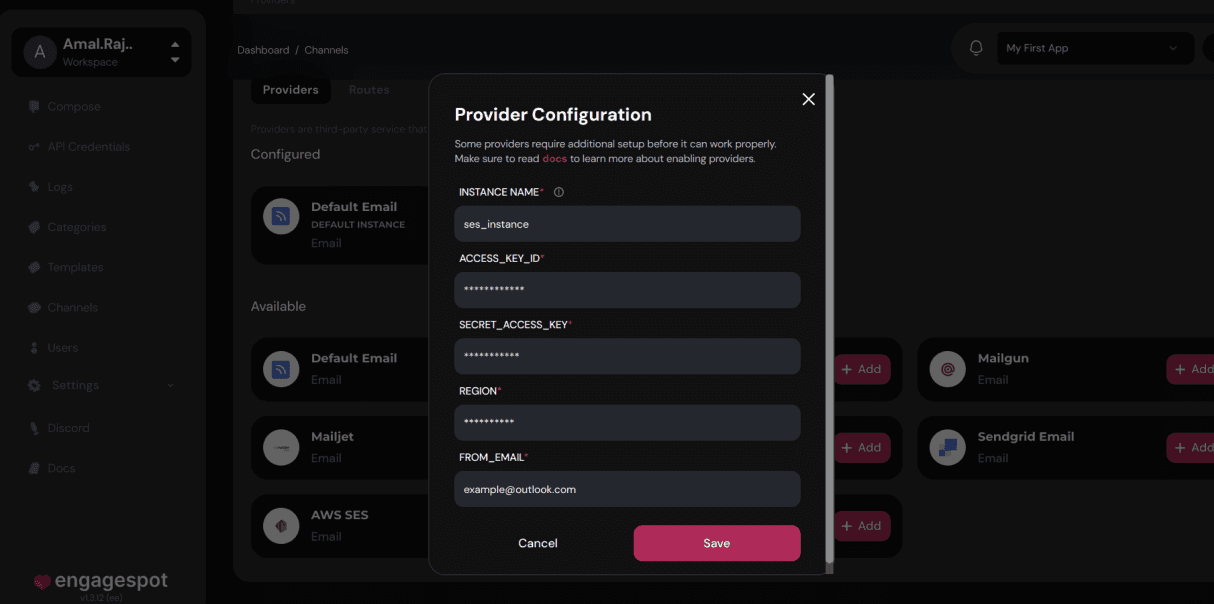
Keys
ACCESS_KEY_ID : AWS IAM Access Key ID
SECRET_ACCESS_KEY : AWS IAM Secret Access Key
REGION : Your AWS SES Region
FROM_EMAIL : Verified From Email identity on your SES account
Add these keys we already generated from AWS console and Save
Finally our goal is done, we have successfully enabled the SES provider in Engagespot. Now, you can send emails through Engagespot using the SES provider.
Conclusion
The blog outlines a step-by-step process to integrate AWS SES with Engagespot for sending emails efficiently. It covers creating IAM users, generating access keys, verifying email identities in SES, configuring SES in Engagespot, and enabling the SES provider. This integration enhances email delivery capabilities by leveraging AWS SES's features through Engagespot's platform
Build your own notification infrastructure effortlessly with Engagespot