In this tutorial, we'll learn how to build a chat application in React using Socket.io. Chat is an essential feature in apps that facilitates collaboration between two users. And for chat to be realtime, Websocket technology is widely preferred. In this tutorial, we'll use the popular socket.io library for enabling Websockets in React. Socket.io facilitates bidirectional communication between the server and client, enabling real-time communication. By the end of this tutorial, you’ll have created a functional chat application and gained a deeper understanding of Socket.io.
Setting up React and NodeJS
For ease of collaboration and project structure, we'll keep both frontend and backend components in a single folder. In frontend we will use ReactJS, and the backend will use Express.
Setting up the React client app
We'll use Vite to set up the React application.
1. Install React
npm create vite@latest my-chat-app --template react
cd
2. Install necessary packages
npm install socket.io-client react-router-dom
Setting up the Nodejs server
1. Initialize the server project
mkdir server
cd server
npm init -y
2. Install necessary packages
3. Create the server (`index.js`)
import { createServer } from 'node:http';
import { Server } from 'socket.io';
import express from 'express';
import cors from 'cors';
const app = express();
const server = createServer(app);
const port = 9000;
app.use(cors());
app.get('/hello', (req, res) => {
  res.json({ response: 'Hello World!' });
});
app.listen(port, () => {
  console.log(`App listening on port ${port}`);
});
4. Add Socket.io connection
import { Server } from 'socket.io';
   const io = new Server(server, {
     cors: {
       origin: 'http://localhost:5173',
     },
   });
   io.listen(4000);
   io.on('connection', async socket => {
     console.log('user connected');
     socket.on('disconnect', () => {
       console.log('user disconnected');
     });
   });
5. Configure nodemon
Update package.json:
"scripts": {
  "start": "nodemon index.js"
}
6. Start the server
Setup Socket.io in React
To create a socket instance in the React app, follow these steps:
1. Create a socket instance file (`src/socket.js`)
import { io } from 'socket.io-client';
const URL =
import.meta.env.NODE_ENV === 'production' ? undefined: 'http://localhost:4000';
export const socket = io(URL, {
  autoConnect: false,
});
You can now import and use this socket instance anywhere in your React application.
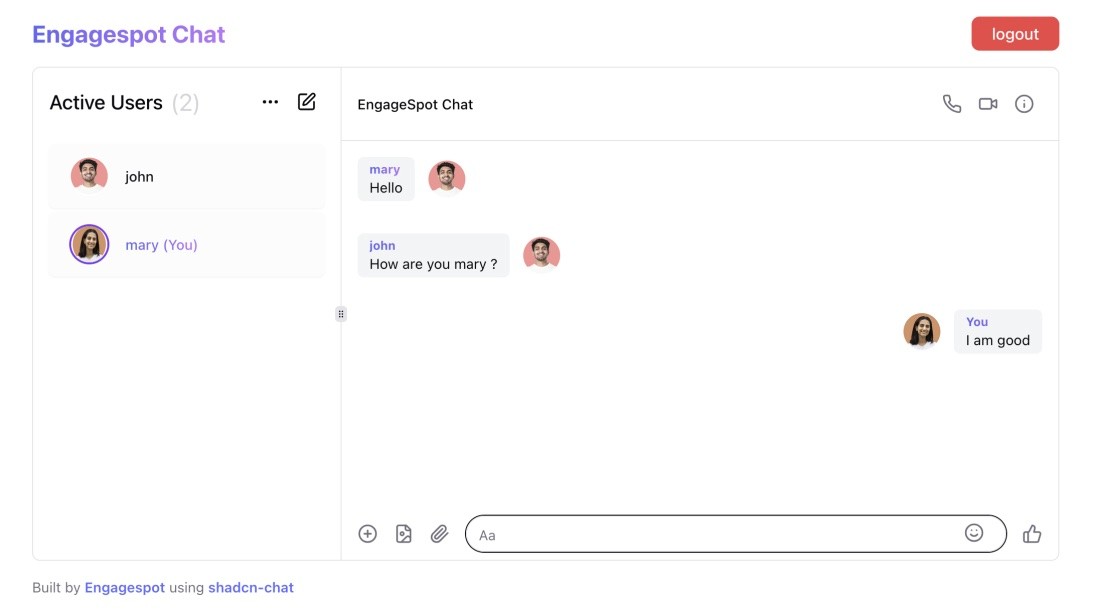
Creating the chat app UI
Our chat application will have two main pages:
1. Login Page: Where users can select an avatar and enter their name.
2. Chat Page: Where users can chat with all logged-in users.
We'll use shadcn-chat for the chat UI, which is built in Next.js. Some modifications are needed to make it work with React.js. Alternatively, you can create your own UI.
State logic behind the chat app
We need three main pieces of data for a fully functional chat app:
1. The current logged-in user
2. All active users
3. All messages in the chat
Setting up the store
We'll use Zustand to create these data stores, making them accessible across the entire component tree. We'll also add a persistence wrapper so that the data is retained even if the user refreshes the page.
1. Create the store (`src/store.js`)
import { create } from "zustand";

import { persist } from "zustand/middleware";

export type User = {
  id: string;

  avatar: string;

  name: string;
};

export type Message = {
  id: string;

  message: string;

  user: User;
};

export type ChatState = {
  loggedInUser: User;

  users: User[];

  messages: Message[];

  setMessages: (messages: Message[]) => void;

  setUsers: (users: User[]) => void;

  setLoggedInUser: (user: User) => void;
};

export const useChatStore = create<ChatState>()(
  persist(
    (set) => ({
      loggedInUser: {} as User,

      users: [] as User[],

      messages: [] as Message[],

      setMessages: (messages) =>
        set(() => ({
          messages,
        })),

      setUsers: (users) =>
        set(() => ({
          users,
        })),

      setLoggedInUser: (loggedInUser) =>
        set(() => ({
          loggedInUser,
        })),
    }),

    {
      name: "chat-storage",
    }
  )
);
Implementing socket connections
Sending messages
When the user sends a message, we emit it via sockets.
1. Chat Page (`src/pages/Chat.js`):
import React, { useState } from "react";
import { useChatStore } from "../store";
import { socket } from "../socket";
const Chat = () => {
const [message, setMessage] = useState("");
const { loggedInUser, messages, setMessages } = useChatStore(
(state) => state
);
const handleSend = () => {
if (message.trim()) {
const newMessage = {
id: getUniqueId(),
user: loggedInUser,
message: message.trim(),
};
socket.emit("message", newMessage);
setMessages([...messages, newMessage]);
setMessage("");
}
};
return (
<div>
{}
<button onClick={handleSend}>Send</button>
</div>
);
};
export default Chat;
Handling Messages on the Server
The server broadcasts the message to all users except the sender.
1. Update server code (`index.js`):
let messages = [];

io.on("connection", async (socket) => {
  socket.on("message", async (msg) => {
    messages = [...messages, msg];

    socket.broadcast.emit("message_response", messages);
  });
});
Listening for events in the client
In the client, we listen for incoming messages and update the store accordingly.
1. Chat Page (`src/pages/Chat.js`):
React.useEffect(() => {
  const handleMessageResponse = (messages) => {
    setMessages(messages);
  };

  socket.on("message_response", handleMessageResponse);

  return () => {
    socket.off("message_response", handleMessageResponse);
  };
}, [setMessages]);
Showing active users
Logging in
When the user logs in, we set the logged-in user and navigate to the chat page.
1. Login Page (`src/pages/Login.js`)
import React from "react";
import { useChatStore } from "../store";
import { useNavigate } from "react-router-dom";
import { socket } from "../socket";
const Login = () => {
const { setLoggedInUser } = useChatStore((state) => state);
const navigate = useNavigate();
const onSubmit = (values) => {

  const user = {
    id: getUniqueId(),

    name: values.name,

    avatar: avatarImages[1],
  };

  setLoggedInUser(user);

  socket.emit("join_chat", user);

  navigate("/chat");
};
return <form onSubmit={handleSubmit(onSubmit)}>{}</form>;
};
export default Login;
To show all logged-in users, we emit an event whenever a user joins the chat.
1. Login Page (`src/pages/Login.js`)
const onSubmit = (values) => {
const user = {
id: getUniqueId(),
name: values.name,
avatar: avatarImages[1],
};
setLoggedInUser(user);
socket.emit("join_chat", user);
navigate("/chat");
};
2. Server (`index.js`)
let users = [];

io.on("connection", async (socket) => {
  socket.on("join_chat", async (newUser) => {
    users = [...users, newUser];

    io.emit("all_users", users);
  });
});
3. Client (`src/pages/Chat.js`)
React.useEffect(() => {
  const handleNewUserJoin = (users) => {
    setUsers(users);
  };

  socket.on("all_users", handleNewUserJoin);

  return () => {
    socket.off("all_users", handleNewUserJoin);
  };
}, [setUsers]);
Logging out
To handle logout, we need a button that disconnects the user from the chat and resets the state.
1. Client (`src/pages/Chat.js`):
const handleLogout = () => {

  setLoggedInUser({} as User);

  setMessages([]);

  setUsers([]);

  navigate("/");

  socket.emit("leave_chat", loggedInUser.id);

  socket.disconnect();
};
2. Server (`index.js`)
io.on('connection', async socket => {

   socket.on('leave_chat', async userId => {

     users = users.filter(user => user.id !== userId);

     io.emit('all_users', users);

   });

 });
Adding a typing indicator to the chat app
To further enhance the chat experience, we can add a feature that indicates when a user is typing. This will involve emitting typing events from the client to the server and then broadcasting these events to other connected clients.
Client-side implementation
We'll start by updating the client to emit a typing event when a user is typing.
1. Emit Typing Events
Update the Chat component to emit a typing event when a user starts typing. This will also involve handling the state to show and hide the typing indicator.
import React, { useState, useEffect } from "react";

import { useChatStore } from "../store";

import { socket } from "../socket";

const Chat = () => {
  const [message, setMessage] = useState("");

  const { loggedInUser, messages, setMessages } = useChatStore(
    (state) => state
  );

  const [typingUser, setTypingUser] = useState("");

  const handleTyping = (e) => {
    setMessage(e.target.value);

    socket.emit("typing", loggedInUser.name);

    setTimeout(() => {
      socket.emit("stop_typing", loggedInUser.name);
    }, 1000);
  };

  useEffect(() => {
    socket.on("typing_response", (username) => {
      setTypingUser(username);
    });

    socket.on("stop_typing_response", () => {
      setTypingUser("");
    });

    return () => {
      socket.off("typing_response");

      socket.off("stop_typing_response");
    };
  }, []);

  return <div>{typingUser && <p>{typingUser} is typing...</p>}</div>;
};

export default Chat;
In this code, handleTyping emits a typing event when the user starts typing and a stop_typing event after a short delay. The useEffect hook listens for typing_response and stop_typing_response events to update the typingUser state.
Server-side implementation
Update the server to handle typing events and broadcast them to all connected clients.
1. Handle Typing Events
Modify the server code to listen for typing and stop_typing events and broadcast them to all clients.
io.on("connection", async (socket) => {
  socket.on("typing", (username) => {
    socket.broadcast.emit("typing_response", username);
  });
  socket.on("stop_typing", (username) => {
    socket.broadcast.emit("stop_typing_response", username);
  });
});
In this code, when a typing event is received, the server broadcasts a typing_response event to all other clients. Similarly, when a stop_typing event is received, the server broadcasts a stop_typing_response event.
Conclusion
This tutorial has walked you through building a real-time chat application using React and Socket.io. We've covered setting up the frontend and backend, creating socket instances, managing user states, and handling real-time message broadcasting. By following these steps, you should now have a fully functional chat application.