Back

Tutorials

Mar 21, 2024

How to build webhooks using NestJS

Jobin Jose

Introduction

Webhooks are a powerful tool for enabling real-time communication between web applications. In this tutorial, we'll learn how to build webhooks using NestJS, a popular Node.js framework. You might need to build webhooks in your applications to help your customers integrate your service to any other third party services, or receive notifications etc.

In this guide, we'll use Engagespot to build a scalable webhook system in your NestJS app.

What is a webhook?

Webhooks provide a way for applications to communicate with each other by delivering real-time notifications or data updates when specific events occur. Unlike traditional APIs where applications must constantly poll for updates, webhooks initiate communication by sending data to predefined endpoints when certain events happen.

1. Enabling webhook in Engagespot -

Engagespot supports sending notifications via multiple channels and webhooks is one among them. All you have to do is enable the webhook channel in your Engagespot app.

To begin, log in to your Engagespot account.

  • Navigate to Channels -> Webhook.

  • Enable the webhook feature. Optionally, you can set a signing key for added security.

  • It's crucial to ensure that the webhookURL is present in the user's profile in Engagespot.


2. Setting up the NestJS project:

Let's start by setting up our NestJS project.

npm i -g @nestjs/cli 
nest new webhook-app

3.Creating the web API endpoint:

We'll create a simple web API with an endpoint to handle order creation.

// app.service.ts

   import { Injectable } from '@nestjs/common'; 
    
   @Injectable() 
   export class AppService { 
     createOrder(data) { 
       // Implementation of order creation
       return data; 
     } 
   } 

   // app.controller.ts

   import { Body, Controller, Post } from '@nestjs/common'; 
   import { AppService } from './app.service'; 
    
   @Controller() 
   export class AppController { 
     constructor(private readonly appService: AppService) {} 
    
     @Post('/order') 
     createOrder(@Body() data) { 
       const createdOrder = this.appService.createOrder(data); 
       return createdOrder; 
     } 
   }

4. Integrating Engagespot for Webhook Notifications:

Let's integrate Engagespot to send webhook notifications for new orders.

- Install the Engagespot Node.js package:

npm install @engagespot/node

Initialize the Engagespot client in app.service.ts:


// app.service.ts
   
     import { Injectable } from '@nestjs/common';
     import { EngagespotClient } from "@engagespot/node";
    
     @Injectable() 
     export class AppService {
       private engagespotClient;
     
       constructor() {
         this.engagespotClient = EngagespotClient({
           apiKey: 'YOUR_ENGAGESPOT_API_KEY',
           apiSecret: 'YOUR_ENGAGESPOT_API_SECRET'
         });
       }
     
       createOrder(data) { 
         // Implementation of order creation
     
         // Send Engagespot notification for the new order
         this.sendEngagespotNotification(data);
     
         return data; 
       } 
     
       private sendEngagespotNotification(orderData) {
         // Construct Engagespot notification payload
         const notificationPayload = {
           notification: {
             title: "Order generated",
             message: `New order created with ID ${orderData.orderId}`,
             url: `https://support.mydomain.com/orders/${orderData.orderId}`,
           },
           sendTo: {
             recipients: [orderData.userId] // Assuming userId is available in order data
           }
         };
     
         // Send notification using Engagespot client
         this.engagespotClient.send(notificationPayload);
       }
     }

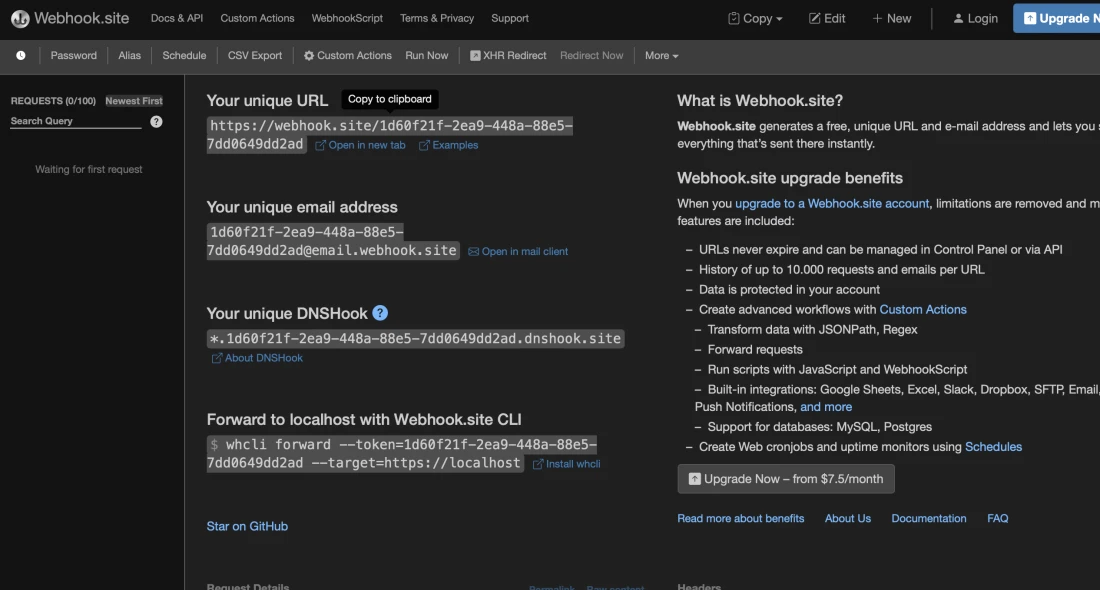
5. Setting a Webhook URL for Users:

It's essential to set a webhook URL for users to receive webhook notifications. Here's how you can do it:

  • Use a tool like https://webhook.site to generate a dummy webhook URL for testing.

  • In your code, use Engagespot's client to update the webhook URL for a specific user:


import { EngagespotClient } from '@engagespot/node';

     const client = EngagespotClient({
       apiKey: 'ENGAGESPOT_API_KEY',
       apiSecret: 'ENGAGESPOT_API_SECRET',
     });

     client.createOrUpdateUser('identifier', {
         webhookUrl: 'your webhook URL',
     });

6. Running the Application:

Start the NestJS application:

 npm run start

7. Testing the Webhook:

Test the webhook by making a POST request to the `/order` endpoint using tools like Postman. Ensure that Engagespot stores the webhook URL in the user's profile.


   POST /order HTTP/1.1
   Host: localhost:3000
   Content-Type: application/json
   
   {
       "userId": "123",
       "orderId": "789", // Add orderId if available in your order data
       "productId": 1,
       "amount": 1,
       "deliveryAddress": "Fake Street 123"
   }

Verify that the webhook notification is received at the specified URL.

Conclusion:

In this tutorial, we explored how to implement webhooks using NestJS and integrate Engagespot for sending webhook notifications. Webhooks enable real-time communication between applications, fostering seamless data exchange and event-driven workflows.

Jobin Jose

Share this post